
Wiring up to the Camera:-
I’d read on the forums that threading the camera wires through the boot lid trunking can be very tricky.
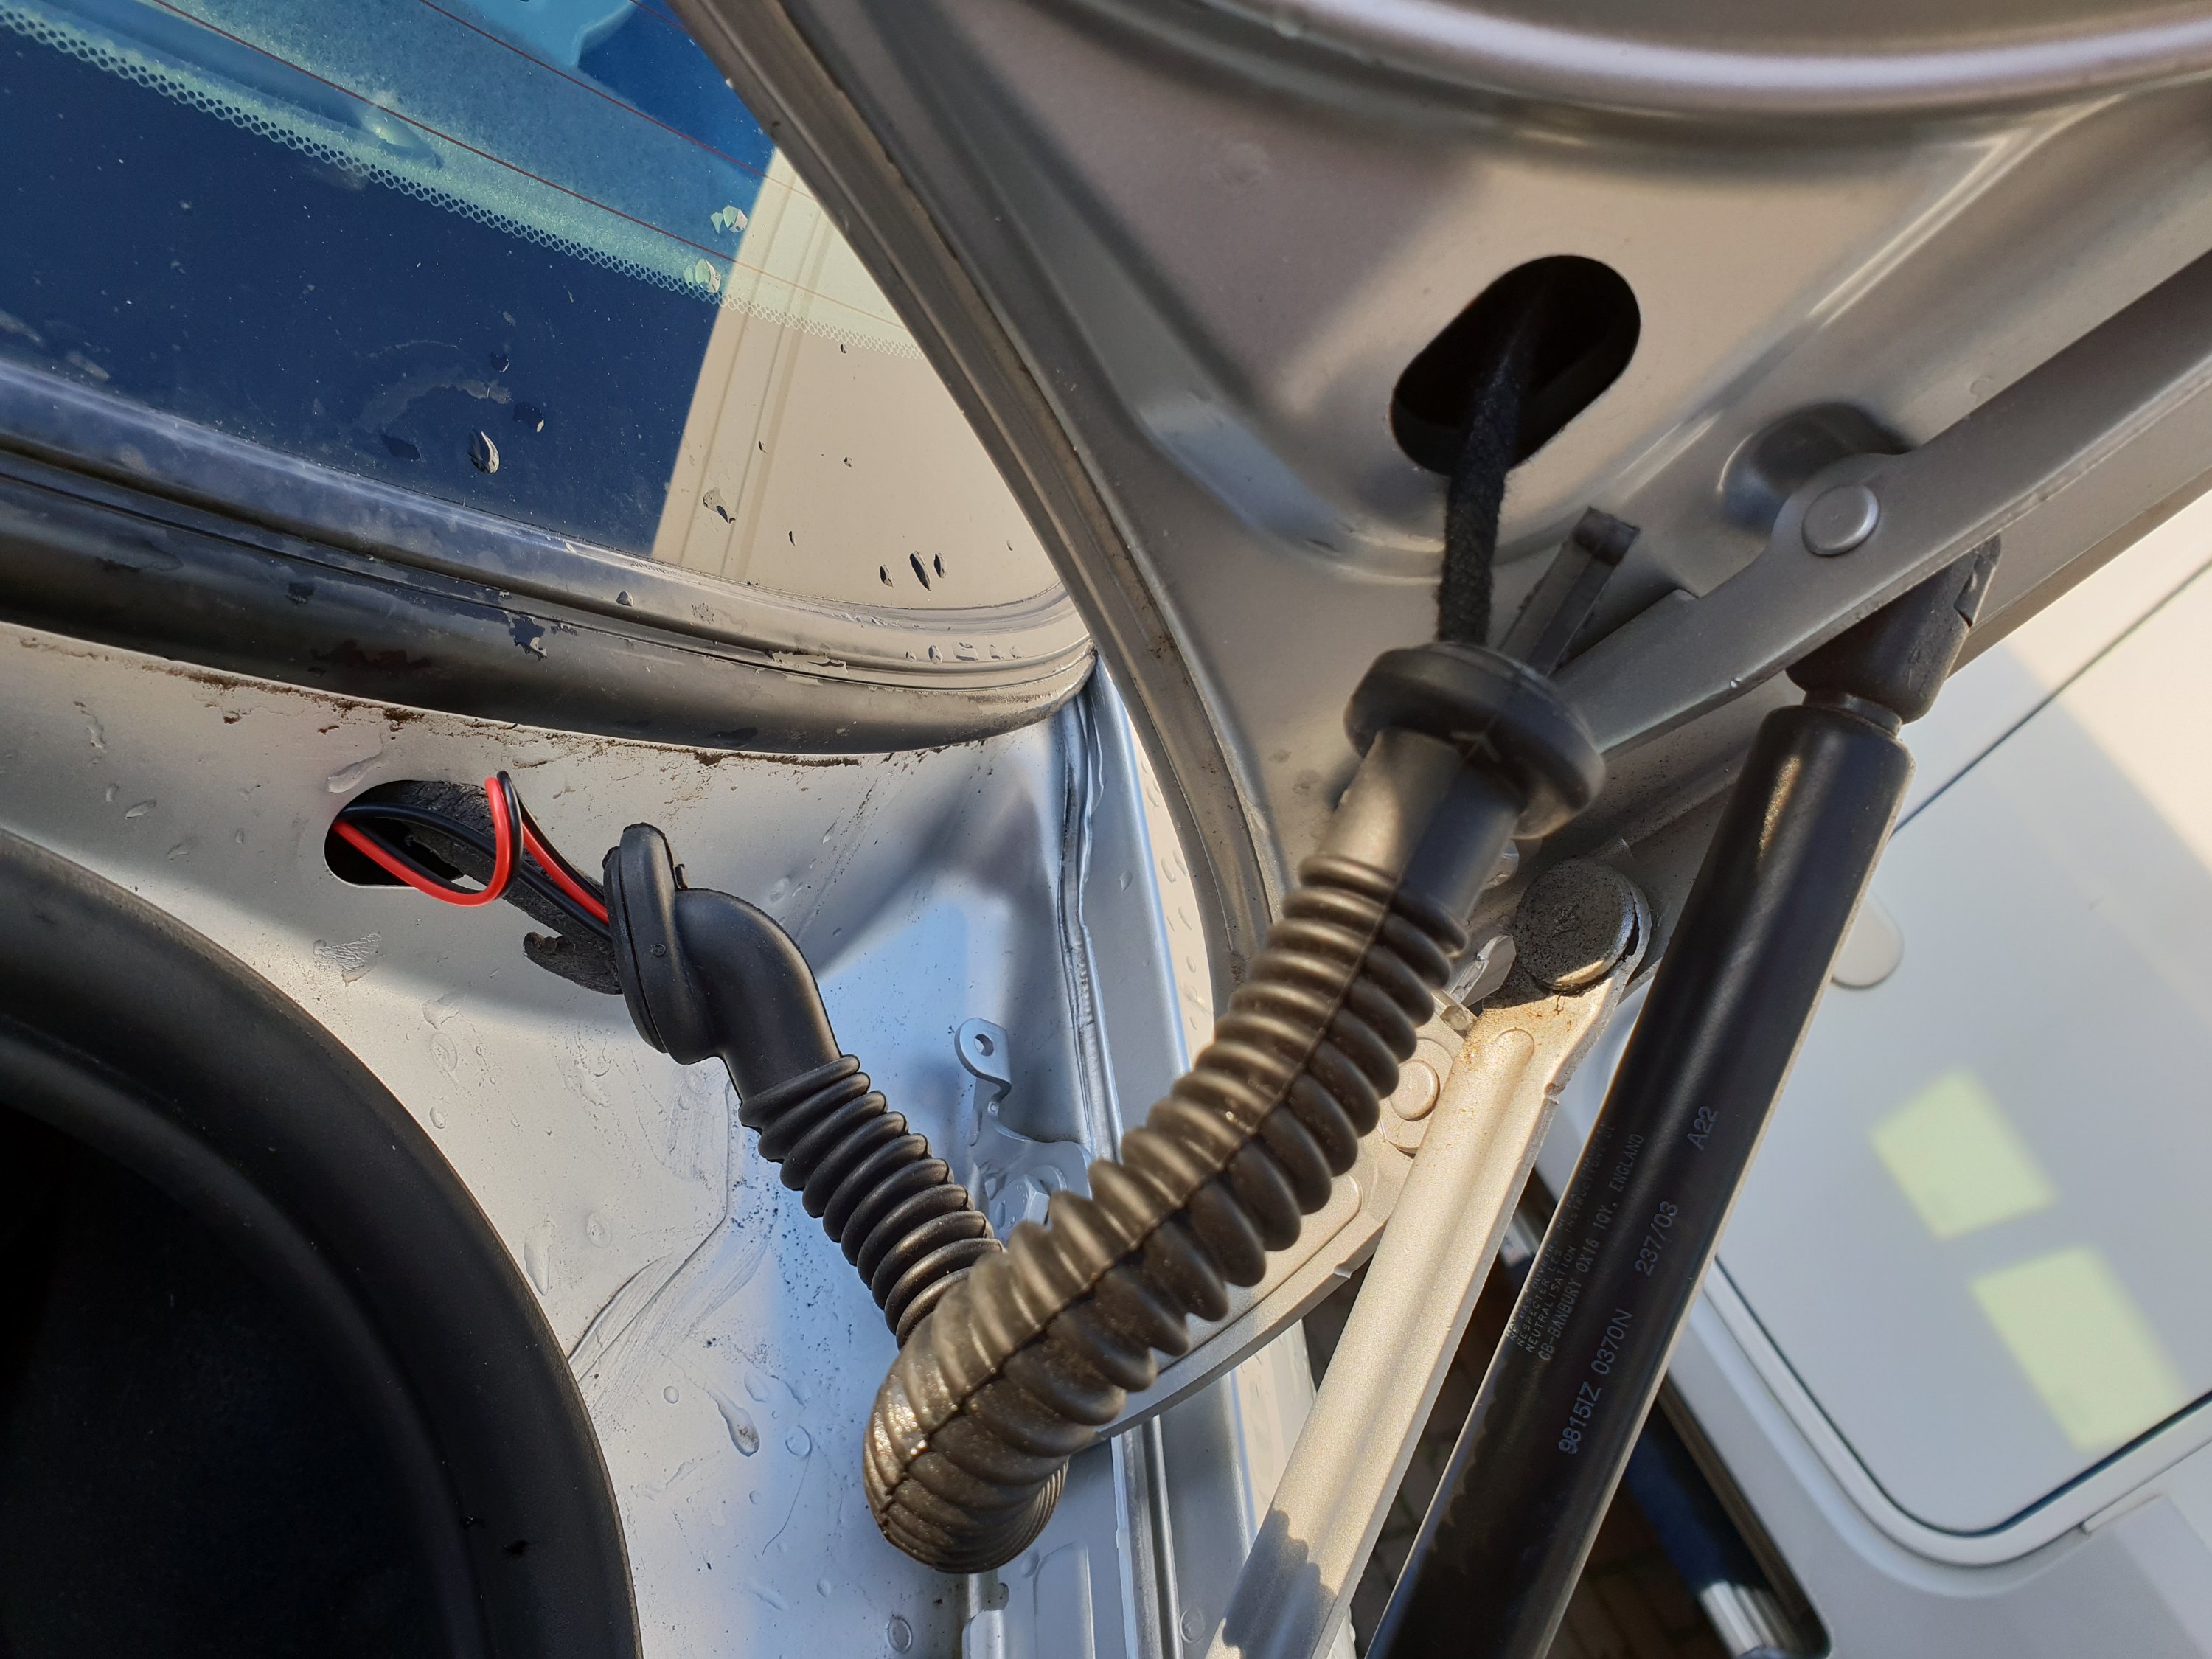
I pulled the trunking out from each end to find that the existing wires to the number plate lamp still left a lot of space for the camera plug. The awkward bit was getting it started around a 90deg bend on the trunking. Once past that it was just a matter of gently threading the plug through the trunk to out the other side.
TIP:- spray some silicone spray into the trunk – it makes it alot easier.
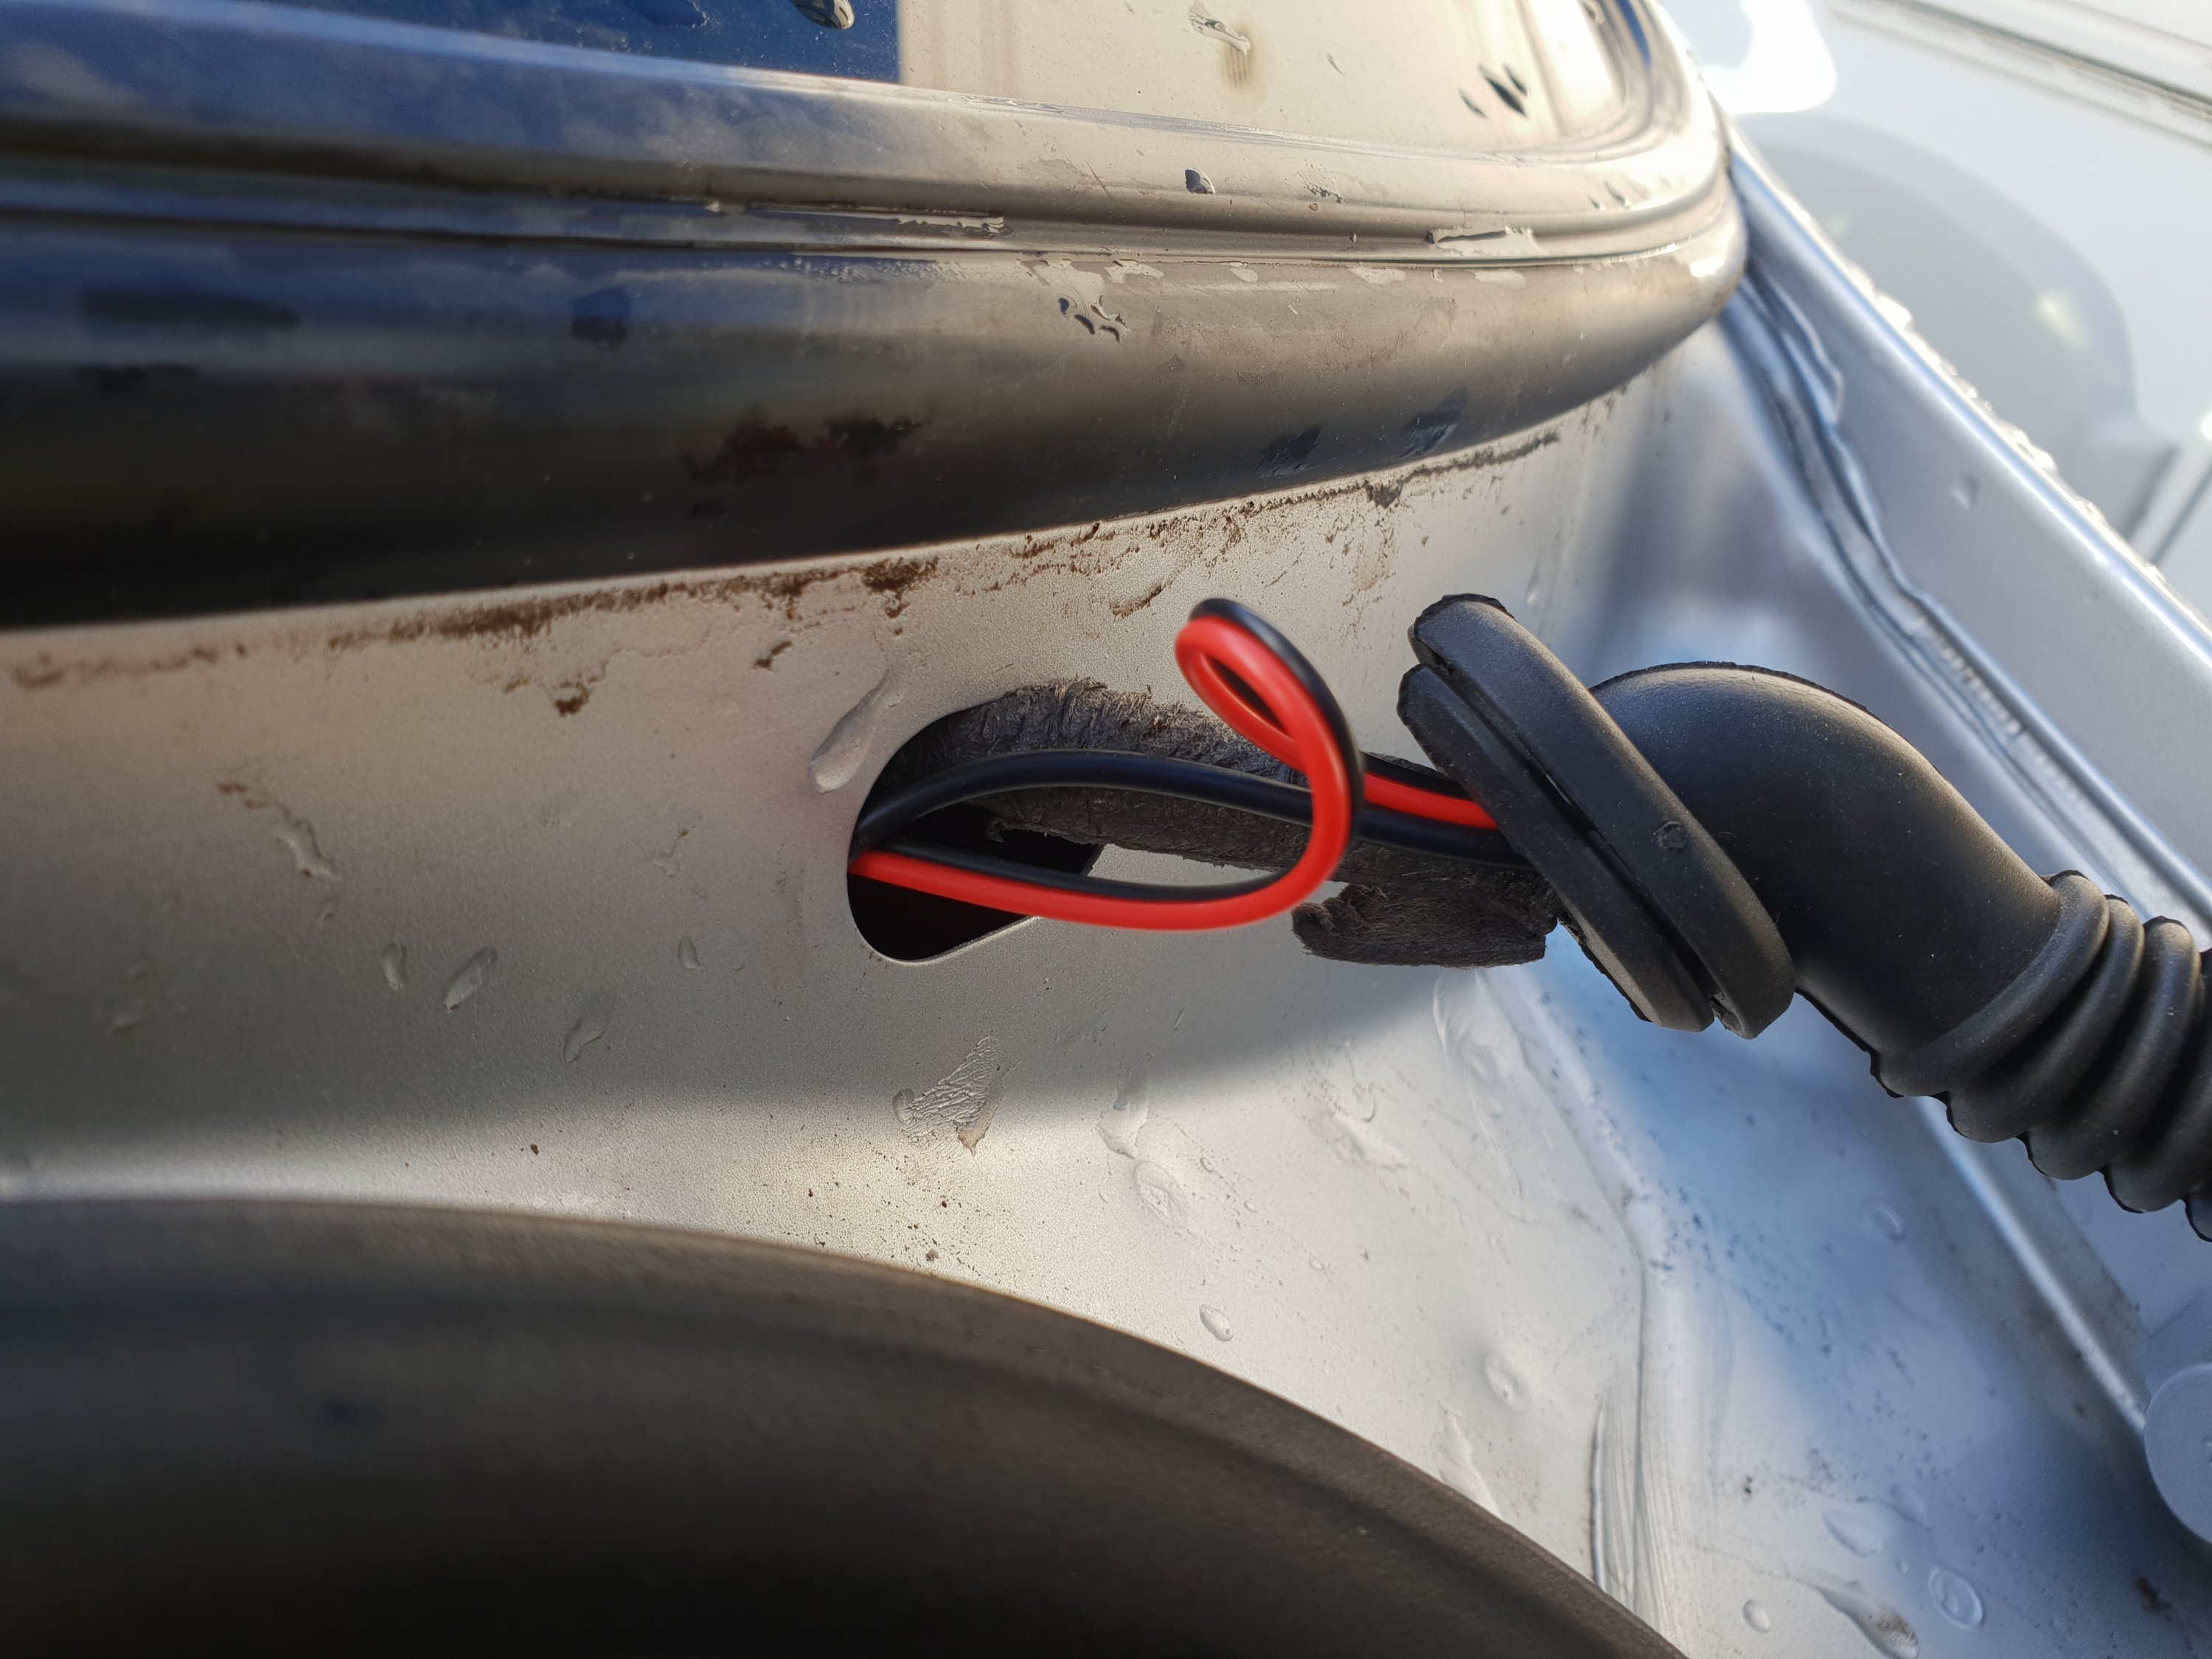
I used a stiff wire to find a route through the innards of the boot lid and body then taped the camera wires to it and pulled them through to and from the trunking.

I plugged the cables into the camera leads and taped the wires to the inside of the boot lid to keep them from rattling around and replaced the cover. So this stage is done and not as hard as I thought it would be.

Next stage (part 3) to connect the trigger relay to the reverse light feed wires ready to plug into the video unit looms.

See:-
Fitting a Reversing Camera – Part 1 installing the camera into position
Fitting a Reversing Camera – Part 2 wiring in the camera
Fitting a Reversing Camera – Part 3 wiring and fitting the trigger relay
Fitting a Reversing Camera – Part 4 soldering the additional pins ready to fit
Fitting a Reversing Camera – Part 5 fitting the additional pins into the plugs, test and play!
Fitting a Reversing Camera – Part 6 buy the additional terminal pins and RCA socket on eBay

5 Comments
Comments are closed.